SRT RSS Feed

Shutterfly vs. Snapfish

If you like this post or find it even remotely helpful/informative, leave me a comment, tweet it, or click around on the site a bit with all that spare time you have (there’s no advertising anywhere on here – believe me it’s not for lack of trying). If none of that trips your trigger, then how about joining the Road Trip Revolution at the Solo Road Trip Facebook Fan Page, here.

There is also now a Shutterfly vs Snapfish, Take II.

*****************************

For me, shooting digital has resulted in a screeching halt of printing. I’m guessing it’s the same for you.  A local commercial color printer continues to print the captures I want to add to my portfolio, but those are laughingly rare and consist largely from Western China and the Great Plains region of the U.S.

Having discovered Shutterfly a few years ago, I uploaded family photographs taken over that year and had personalized calendars made for Christmas gifts. They were a huge hit and I thought Shutterfly did a good job with them.  After that, I began using them for all my printing and various fun photo projects (personalized calendars, coffee mugs, mouse pads, photo albums).

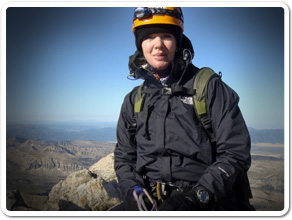
I’ve been happy with the prints, but Snapfish (by HP) caught my attention recently and I thought I’d give them a try. Of course, I wanted to compare, so I had both Snapfish and Shutterfly print identical photos of my 5.6 rated technical summit of Grand Teton.

The upload process was the same – both were fast and without fuss.  The total spent at Snapfish for 8-4×6’s and 3-5×7’s, including shipping was $4.05. At Shutterfly, I ordered one more 5×7 by mistake. My total there was $7.67. Since it was my first order with Snapfish, the 4×6’s were free (20 free 4×6’s after your first upload). Shutterfly frequently offers similar deals.  Comparing  pricing, I surmise they are very similar, even though this order was more with Shutterfly (with the add’l 5×7). Shipping speed was the same- ordered on the same day, received both orders a few days later.

As cameras have dynamic ranges that see the scene differently (see this article on L’heure Bleue – The Blue Hour), printing 4×6’s can be very tricky. Most point-and-shoot cameras have a 4:3 aspect ratio.  Translation: upon printing, a 4×6 photo will be cropped somewhere.  The fix? Snapfish offers a 4×5.3 “True Digital” option that prints the photo with no cropping.  But frames for a 4×6 will not work for this option. Furthermore, several online forums report there IS cropping, even on the 4×5.3 photos. And when I went back to Snapfish to find this option so I could better explain it to you, I couldn’t find it! Made me crazy.

Shutterfly allows you to select your own crop.  So you choose the photo, then say you choose the 4×6 print option. A preview screen comes up showing the 4×6 area, and allows you to drag the photo around the space.  This means you don’t get a photo back with the sunset at the top missing, or someone’s head cut off (see post about Bad Photography, or Good Photography with a Disposable Camera!).  The 4×6 photo will also neatly fit into a frame.

So what about the most important factor – print quality?  Shutterfly gets the nod hands-down. The color, ESPECIALLY the skin tones, is markedly BETTER than Snapfish. In the Snapfish photo, my face looks ghostly pale.  In the Shutterfly photo, the blacks are blacker, the colors pop – like they’re supposed to.

Shutterfly will continue receiving my business (until someone else catches my attention and I have to do another comparison).

Here are the two photos – both scanned by my cheap-o scanner/printer/fax/copier purchased for $100 six years ago and still buzzing along quite nicely.  Pay attention to the overall color, the blacks, and the skin tones.

side by side

Shutterfly on the Left; Snapfish on the Right

Join the Road Trip Revolution at the Solo Road Trip Facebook Fan Page, here.

Now What? Part III…the Finale

We resume the regularly scheduled programming – specifically the last part of the series that began with the Rah Rah! article encouraging you to shoot with whatever camera you happen to have: Great Photos from Really Cheap Cameras.

Now What? Part I and Part II were tips and pointers on what to do with that cheap/old/outdated camera to achieve photos you’ll be proud of.

All the tips apply to ANY camera but since we began with a discussion that followed the woefully inaccurate adage of crappy camera = crappy photos, it only makes sense to play this out.

  • Stop looking at what everyone else is doing until you’ve figured out WHAT is it YOU like. It’s easy to be pulled in every direction by the latest whim, gadget, or toy without ever learning what pleases your own eye. About the time you’ve invested in the latest, the tide turns to retro. Do you like photos that are a bit soft, out of focus even?  Do highly processed HDR images make your heart pound, your palms sweaty? Or do you prefer tack sharp, head-on realistic?  Figure out what you like and forget about what anyone else thinks – their inclinations don’t matter, and you’ll have a hard time keeping up with all the gadgets. If you like a particular style, find out how to achieve it, then set out to perfect it.

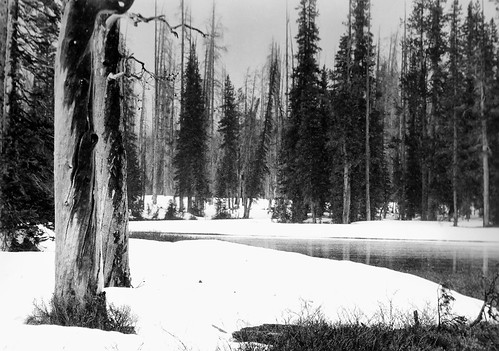
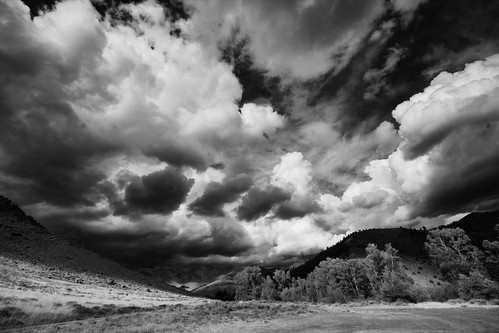
Personally, I like tack sharp, Anseladamsesque realism (and I really liked making that one word).  I enjoy the emotion conveyed by powerful, natural elements and take particular pleasure in viewing images that give the impression that with one step, you could be in that frame.  Menacing clouds with bits of sun peeking through, the appeal of details wedged in by shadow, the raw, hard lines/crevices of rocks or faces – these appeal to my eye. These are what I enjoy capturing. This “style” is what I’ve focused on.

Yellowstone Winter

Yellowstone

Wyoming Wonder

Wyoming Wonder

Bryce National Park

Bryce Canyon National Park

Kyrgyzstan Gentleman, Xinjiang Province

Uigher Man

  • Experiment.  If you have a camera with interchangeable lenses, put on one lens and shoot EVERYTHING with it for 2 weeks.  If you don’t have interchangeable lenses, shoot EVERYTHING at ONE setting for 2 weeks. IF you’re not shooting a lot, then keep the same lens/setting for longer.
  • Learn one basic retouching technique.

Trained in the darkroom, I’m a bit of a purist at heart. Since my first priority with this series is to help you, I must confess – I’ve learned Photoshop.  Sssssssss….. Now that’s out, I feel much better.

However, (surely you expected a “however”?!) my skills are limited to improving what the camera captured as opposed to changing it.  In other words my Photoshop skills are basic.

Actually my Photoshop skills mimic what I can do in the darkroom.  Oh, I know you thought Ansel was a straight-up kind of guy. NEWS FLASH!!! What that man did in the darkroom with chemicals and fingers waving under the enlarger bulb, is no different than a bit of basic Photoshop.  No different at all.

My favorite Photoshop darkroom technique is “levels.”  All my B&W’s get a levels adjustment, and a lot of color shots as well.  Second favorite is the “high pass” filter utilizing the “overlay” choice for the layer. I’ve recently discovered a Photoshop plug-in software, SilverEfex by Nik Software.  It’s almost weaned me from the gnawing lust to lose myself in the red glow of the darkroom lamp.  Almost.

  • Don’t be afraid to use flash.  You SHOULD use it for backlit subjects/scenes.  Again, experiment.
  • Take a Basic Photography course
  • Take a Basic Photoshop course
  • Take photos of things you don’t think are photo worthy at the time. No regrets!
  • HAVE FUN!

Here’s what happens when you have fun, you don’t take yourself too seriously, and you ummmm occasionally let go of the style you really prefer.

agave #2

Agave #1. Taken with a point-and-shoot.

agave #1

Agave #2. Taken with a point-and-shoot.

IMG_5339 copy

The only thing French I own — an antique French gate. NOT taken with a point-and-shoot. LOL

Now What? Part II … Of Regret

You read your manual, right?  Okay, but you’re going to, right?  As discussed in Part I of how to get great photos from whatever camera you’re currently holding in your hand, reading the manual is crucial. You may not learn a lot about photography from the manual, but knowing what the buttons and dials do will go a long way in helping the end result. And the cheaper the camera, the more you need to know about its operation. Now that that’s out of the way, let’s proceed.

Sadly, I’ve had several regretful moments with my photography. Regret in the sense I didn’t take a picture of something that on hindsight was a monumental highlight either during a trip, or some event that would never be repeated. Such as, you ask?  Such as the time I negotiated for 2 days with a carpet factory owner on the 6,000 year old Silk Road in Kashgar, China for a hand-tied silk rug, and left without a picture of the three of us – me, him, and the rug.

the silk rug

The rug now hangs in my study. It’s stunning; the back almost as beautiful as the front because of the tapestry effect created by all those tiny knots. I’ve got the receipt from the purchase. I’ve got the story of the owner inquiring of my hotel information from the tour guide my son and I were with that day and contacting me directly at the room (would NOT happen anywhere else in the world).  And how my son and I negotiated like we’d done it a thousand times before. And how we had to accumulate enough cash for the purchase over a 3 day period and then used most of our U.S. dollars in the end because we ran out of time. And how we traveled to the factory that day with 6,300 Yuan on us, stuffed into every nook of our backpacks and clothing. And were 1,000 Yuan short and knew we’d have to negotiate like our lives depended on it, or head The Rugto our next destination with all that cash.   I have all that.  But I don’t have a picture of kind, sweet “Andy” who hadn’t seen a tourist in months, whose family was depending on that sale from the Americans for sustenance, whose face indicated we’d reached his bottom-dollar when I told him all I had was 6,300 Yuan (at that point, I actually wished I had more to give him). I missed that opportunity. Maybe I was just so thrilled to be the owner of a future family heirloom with such a great story behind it. I’d told myself I’d be purchasing nothing, that the trip itself, with my beloved son, was enough. Maybe we were in a hurry to catch the train to our next destination since we’d checked out of our hotel. Maybe I was just relieved the exhilarating and exhausting process was over and that I had the rug and Andy had a sale.  Maybe, maybe, maybe.

My advice in this post is simple: Don’t let regrets happen.  Shoot a LOT.  Don’t allow anyone to make you feel guilty or silly for taking a lot of pictures or for always having a camera on you. Those family gatherings where no one wants to pose for more than 1 second?  Make them stand still for longer. This is not to say there are times when a camera is disrespectful or inappropriate, or downright not allowed. I’m not talking about those times.  Trip that shutter a lot.  If you do that, you’ll reduce the regrets, and guess what? Your photography will improve.

Now What? Part I

Now that you’ve shaken off the cloak of darkness created by the “cheap camera myth” and are ready to either learn photography with the camera you have, or improve your current skill set, we can move forward.

The whole point of the last post, Great Photos from Really Cheap Cameras was to cheer and encourage you to shoot with whatever camera you own. It’s not about the camera. Let me repeat that, It’s Not About The Camera!  Put any camera in the hands of someone with a trained eye, and the results will please.

A lot of the skills I use today with my not-so-cheap camera were learned on a disposable one. Thanks to Kerrin at My Kugelhopf for her story about her Granddad capturing some of the best photos taken at her wedding with a $5 disposable camera! To that, I say EXACTLY. To quote her, “nuff said.”

Assuming you’re shooting with anything other than a disposable camera, here’s the most important tip in the universe: Read The Manual. Oh! I know, you were expecting something more profound! Take comfort in this: there isn’t anything profound in learning photography. Don’t let anyone tell you otherwise. Don’t have your manual?  Check out Craig Camera, or do a search online. Several years ago I located and ordered the manual for my 1957 Yashica and finally figured out how to change the battery. I’ve never claimed to be mechanical.

older than I

When I began in earnest to train my eye, with every shot I mentally repeated two things:

  • If it’s not interesting, you’re not close enough. – Robert Capa.
  • Don’t put the object of interest in the middle, a rule commonly called the Rule of Thirds. Offset the focal point, is easier to remember.

3 additional tips that will help add interest to your captures:

  • Change your perspective. Get higher, go lower, or walk around to see what the scene looks like from a different angle.
  • Look for symmetry of objects or a repeating theme (one of my favorites).
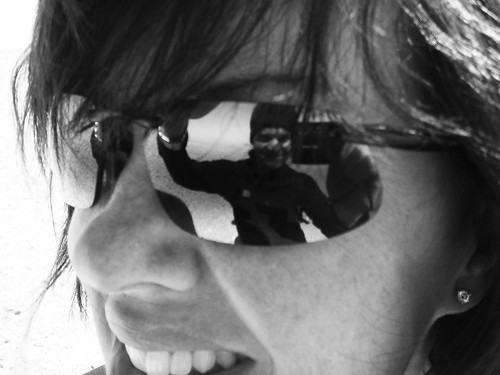
  • Develop your eye to search for reflection. Reflection can be created from water, mirror or glass, the cone of an airplane, a pair of reflective sunglasses, a rear view/side mirror, or someone’s retina.


Perspective

Transaction for a Milk Cow

Sitting next to them at first for the milk cow transaction, I stood up and realized the better shot was from above.

First

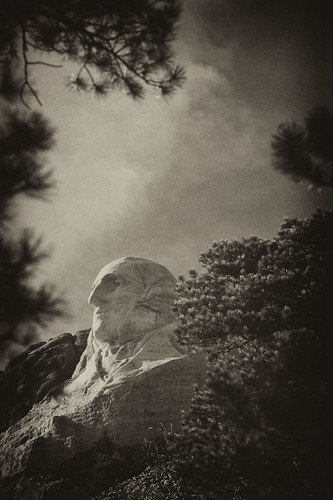
Rolling around on the ground at Mt. Rushmore netted this shot.

Reflection

Self Portrait

Mammoth Falls

IMG_4914 copy

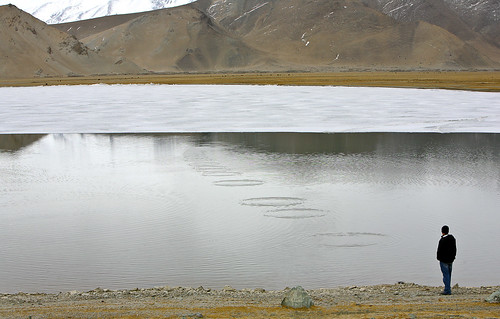
Reflection (water) AND Symmetry (skipping rock)

My Son Skipping Rocks on Karakul Lake

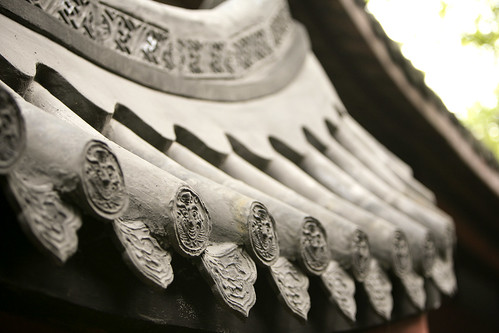
Symmetry

Old Faithful Inn

Buddhist Temple

Great Photography from Cheap Cameras

So you think you need an expensive camera to get good photographs?  Crappy camera = crappy photos?  Does your old, cheap camera have you convinced you can’t pursue photography with the passion you know you have? If so, you’re a victim of the cheap camera myth. Read on.

Li River with a Diana

Your camera has nothing to do with your ability to LEARN photography. So if you read no further, arm yourself with a cheap camera and get out there!

The photo above on the Li River near Guilin China was taken with a $50 camera called a Diana. The Diana is a medium format film camera (now available with a 35 mm back) with a plastic body AND plastic lens. That’s right PLASTIC. Not Zeiss. The vignetting is inherent. The photo is SOOC – straight out of the camera.

I liken the Diana to Forrest Gump’s box of chocolates — you never know what you’re gonna get. Every photo is a surprise — and I like that. While dependability is critical when you need to count on the outcome, the point here is that even with a $50 camera, the potential exists for something you’ll be proud of.

P.S. this is more of a Rah! Rah! session than a lesson. Sometimes motivation is the required pre-requisite.

I don’t consider any of my equipment “cheap”. Although much of it was inexpensive (some even free), every camera in the SRT arsenal is capable of taking great photos, even artistic photos. And who says you have to have new?  All my equipment has been purchased USED or given to me by friends in lieu of a garage sale death.

The cameras are different, with results that span the photographic spectrum from the full framed digital workhorse, the Canon 5D, to the dreamy, you-must-be-high-on-something appreciation that comes out of the Polaroid SX-70 land camera. That’s right, an instamatic film camera that was introduced in 1972 as the first “instant SLR”. And great fun at parties.

A cheap camera, an old camera, an outdated camera, an outdated cheap old camera is NO reason to not pursue your interest in photography.  More visual aids, please!

Xinjiang China with a Diana camera

Peace signs with a Diana

The two above were taken with the Diana. Inherent light leaks and vignetting mean unpredictable results — a  beautiful thing if you’ll just cut the tethers to the digital it-must-be-exactly-as-presented-in-real-life standard.

So you say I had exceptional scenery/characters for the photographs with the Diana?  Here’s one taken over July 4th with the Polaroid SX-70.

July 4th with a Polaroid SX-70

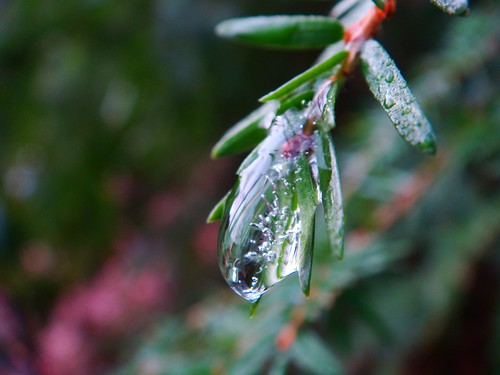
Stepping up in price range, the Sony DSC-T100 Cyber-shot at $400 is my favorite camera for trips to the grocery store, and for macro shots. With a Zeiss lens, the photos produced are hard to beat. After viewing this photo again, the results are hard to beat. Period.

Liquid Light

If you’re still unconvinced photography can’t be pursued with a cheap camera, shoot with one for 2-3 weeks and report back.  Sometimes it’s the simple exercise of carrying the camera around and tripping the shutter that overcomes our excuses.

Check out the Lomography website if you’re interested in exploring film cameras.  And “Lomo” is simply a term for experimental analogue photography — nothing more exotic than that. The prices range from $50 for the Diana, to $350+ for the Lubitel 166+.  If you’ve fallen for the “cheap camera myth”, start with the $50 Diana.


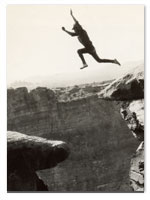
The Grand Climb


Tammie DooleyAbout SRT... I’m a traveler, writer and photographer for whom the open road frequently summons. Adventurous solo road trips are a staple for me, and a curiosity. So I created this website to share them and inspire you to step out and give them a try. Welcome!

A soul that sees beauty may sometimes walk alone – Wolfgang Von Goethe

  • Categories


  •  

    Connect with SRT

    RSS Connect on Twitter Subscribe by Email
    Email me
    Become a SRT Facebook Fan
    Follow me on Twitter
    See my photos on Flickr

    I want to hear from you!
    ~ Tammie


    World Reviewer adventure travel blogs