Now What? Part III…the Finale
We resume the regularly scheduled programming – specifically the last part of the series that began with the Rah Rah! article encouraging you to shoot with whatever camera you happen to have: Great Photos from Really Cheap Cameras.
Now What? Part I and Part II were tips and pointers on what to do with that cheap/old/outdated camera to achieve photos you’ll be proud of.
All the tips apply to ANY camera but since we began with a discussion that followed the woefully inaccurate adage of crappy camera = crappy photos, it only makes sense to play this out.
- Stop looking at what everyone else is doing until you’ve figured out WHAT is it YOU like. It’s easy to be pulled in every direction by the latest whim, gadget, or toy without ever learning what pleases your own eye. About the time you’ve invested in the latest, the tide turns to retro. Do you like photos that are a bit soft, out of focus even? Do highly processed HDR images make your heart pound, your palms sweaty? Or do you prefer tack sharp, head-on realistic? Figure out what you like and forget about what anyone else thinks – their inclinations don’t matter, and you’ll have a hard time keeping up with all the gadgets. If you like a particular style, find out how to achieve it, then set out to perfect it.
Personally, I like tack sharp, Anseladamsesque realism (and I really liked making that one word). I enjoy the emotion conveyed by powerful, natural elements and take particular pleasure in viewing images that give the impression that with one step, you could be in that frame. Menacing clouds with bits of sun peeking through, the appeal of details wedged in by shadow, the raw, hard lines/crevices of rocks or faces – these appeal to my eye. These are what I enjoy capturing. This “style” is what I’ve focused on.
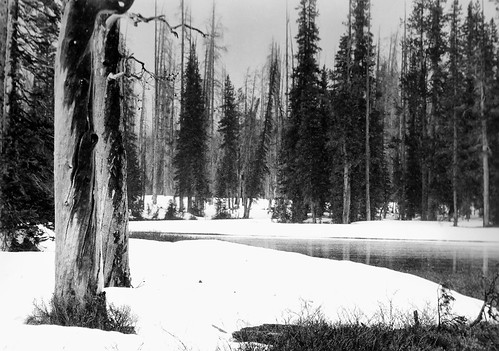
Yellowstone
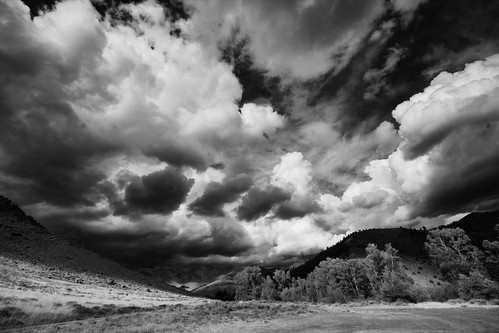
Wyoming Wonder

Bryce Canyon National Park
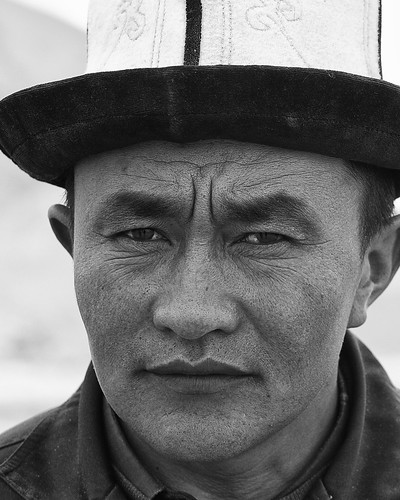
Uigher Man
- Experiment. If you have a camera with interchangeable lenses, put on one lens and shoot EVERYTHING with it for 2 weeks. If you don’t have interchangeable lenses, shoot EVERYTHING at ONE setting for 2 weeks. IF you’re not shooting a lot, then keep the same lens/setting for longer.
- Learn one basic retouching technique.
Trained in the darkroom, I’m a bit of a purist at heart. Since my first priority with this series is to help you, I must confess – I’ve learned Photoshop. Sssssssss….. Now that’s out, I feel much better.
However, (surely you expected a “however”?!) my skills are limited to improving what the camera captured as opposed to changing it. In other words my Photoshop skills are basic.
Actually my Photoshop skills mimic what I can do in the darkroom. Oh, I know you thought Ansel was a straight-up kind of guy. NEWS FLASH!!! What that man did in the darkroom with chemicals and fingers waving under the enlarger bulb, is no different than a bit of basic Photoshop. No different at all.
My favorite Photoshop darkroom technique is “levels.” All my B&W’s get a levels adjustment, and a lot of color shots as well. Second favorite is the “high pass” filter utilizing the “overlay” choice for the layer. I’ve recently discovered a Photoshop plug-in software, SilverEfex by Nik Software. It’s almost weaned me from the gnawing lust to lose myself in the red glow of the darkroom lamp. Almost.
- Don’t be afraid to use flash. You SHOULD use it for backlit subjects/scenes. Again, experiment.
- Take a Basic Photography course
- Take a Basic Photoshop course
- Take photos of things you don’t think are photo worthy at the time. No regrets!
- HAVE FUN!
Here’s what happens when you have fun, you don’t take yourself too seriously, and you ummmm occasionally let go of the style you really prefer.
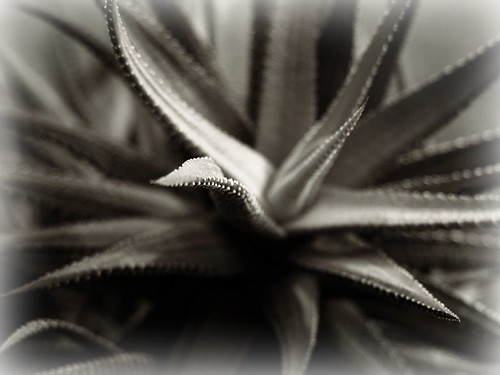
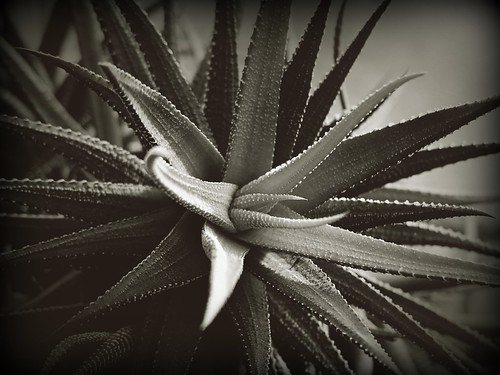
Agave #1. Taken with a point-and-shoot.
Agave #2. Taken with a point-and-shoot.
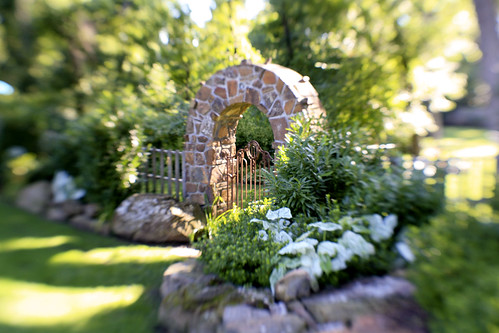
The only thing French I own -- an antique French gate. NOT taken with a point-and-shoot. LOL
 About SRT... I’m a traveler, writer and photographer for whom the open road frequently summons. Adventurous solo road trips are a staple for me, and a curiosity. So I created this website to share them and inspire you to step out and give them a try. Welcome!